Butternut Squash Pizza
About 6 months ago, I watched my first episode of Lost. 2 months later, I finished the final episode. That’s right, 6 seasons in 2 months. Don’t tell me I didn’t have a life.
Since I completely missed the whole Lost bandwagon while the show was on (and therefore missed having about a thousand heart attacks due to cliff hanger episodes and white flashes that don’t get resolved until the next season) I decided that this Halloween I would celebrate Lost and its most amazing character: the smoke monster.
No, no one really got what I was. But it does look like Project Runway threw up on me.
And since I love cooking with a theme, I just had to enter Rachel’s Project Tasteless for this week.
The challenge was to create a pizza based on your Halloween costume. Hmmm….
Maybe I would go all John Locke on the ingredients?
Maybe I would make a pizza of Claire’s favorite food?
Nah, I had to go with my costume in all its glory: Smoke Monster Pizza!
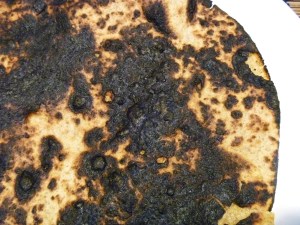
Chargrilled to perfection. Just be careful it doesn’t come out of the woods and eat you alive. Beware of strange electrical sounds.
But in reality, we still had to eat, and not that Smoke Monster pizza doesn’t taste delicious because well, it doesn’t.
When I saw the plea to make this pizza on Rachel’s blog a couple of weeks ago, I knew it would fit the Lost bill. Creamy ricotta, rich squash, and bursting with herbs? It just makes me want to yell,
“We have to go baaaack!”
(and make this again!)
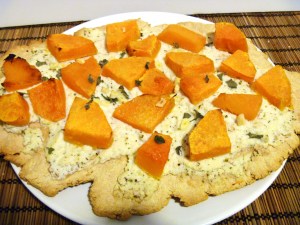
“We Have To Go Back” Pizza (aka Butternut Squash Pizza)

1 small butternut squash
1 tablespoon olive oil
Salt and pepper
1 small onion
1 pizza dough or flatbread
1 cup fat free ricotta cheese
2 cloves garlic
4-5 sage leaves
Preheat oven to 450*
Peel the butternut squash and cut into 1 inch pieces, removing the seeds. Peel the onion and slice in 1 inch rings.
Toss the squash and onion with olive oil, salt, and pepper. Put on a roasting tray and roast for 25 minutes, or until squash is soft. (Stir halfway through cooking).
In a small bowl, combine the ricotta, garlic, and some more salt and pepper. Season with any extra herbs (thyme is great!).
Roll out your pizza dough. Top with a layer of the ricotta cheese, then the roasted squash and onion. Chop up sage leaves and sprinkle over top. Bake according to dough instructions.
Savor, and be happy you’re not stuck on an island.
Gluten Free Apple Pie
(This recipes was intended for submission to Rachel’s Project Tasteless. However, due to my current inability to effectively manage my time, I cooked it to contest standards but failed to actually post it before the midnight on Sunday deadline. If anyone would like to explain to me game theory in economics, perhaps my deadline meeting abilities will be restored!)
Would you believe that I’ve never made an apple pie?
Apple pie is definitely one of my top favorite desserts, and without a doubt my favorite kind of pie. When I was younger, my neighbor would make apple pies built so high it was like a cloud being pulled out of the oven. I love it a la mode, but have a special fondness pairing a slice with a sharp, cave aged cheddar. Don’t even ask, just try it. Your vanilla ice cream with forever remain in your freezer.
However, me making an apple pie is a totally different story. I don’t know why pies make me fearful, but I seem to recall many a bubbly mess from a failed crumble or overcooked tart. A pie would push me beyond my limits, without a doubt.
Since I was entering a challenge, and Z had requested numerous apple pies this year with a solemn “uh huh” from me in response, I knew I had to make one for this challenge. And since this was the Naked Chef challenge, who better to turn to than the original foodie nudie, Jamie Oliver.
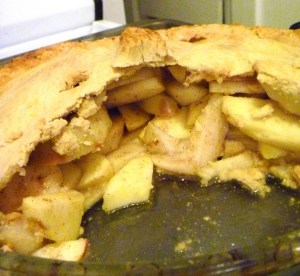
This apple pie is the quintessential British pie. Rather than a thick, cinnamon apple jelly encompassing each slice in the American tradition, these apples are individually cooked, lightly spiced, with a hint of lemon that brings brightness to the dish. And this crust…it made me feel like I wasn’t eating something gluten free.
Gluten Free Apple Pie
Gluten Free Crust (adapted from Food.com)
1 1/2 cups gluten-free flour
1/3 cup cornstarch
1/2 cup sugar
1 teaspoon xanthan gum (Bob’s Red Mills)
8 tablespoons butter, cut into pieces
1 large egg
1 tablespoon vanilla extract
Mix flour, xanthan gum, and cornstarch in a large bowl.
Add sugar, butter, egg and vanilla and mix until combined. It will be quite crumbly.
Turn the mixture onto a clean surface and knead dough until it comes together. Cut in half and wrap each half in plastic wrap. Refrigerate for 20 minutes.
For the Filling (adapted from Jamie Oliver)
6 apples, mix and match the types
3 tablespoons sugar
1/2 teaspoon ground ginger
1 teaspoon cinnamon
1/2 teaspoon nutmeg
Juice of 1 lemon
Peel and core the apples, then thinly slice them into about 10 slices an apple. Put in a large bowl.
Add the other ingredients and toss together until thoroughly coated.
To Put Together
Preheat oven to 350*
Grease a 9″ pie pan
Remove dough from fridge. On a floured surface, roll out one piece of dough until it would cover the pie dish with about a half-inch hanging over the sides. Carefully place in the pan, making sure you push the dough into the sides.
Pile in the apples and pour over any collected juices.
Roll out the second piece of dough and cover the apples with it. Crimp together the edges with your fingers.
Crack and mix an egg in a small bowl. Brush egg in a light layer over pastry crust.
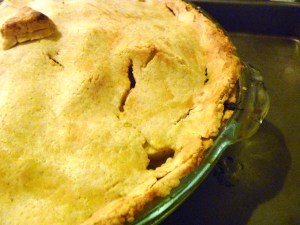
Bake in the oven for 35 – 40 minutes, or until crust is golden brown.
Barbecue Meatballs and Spaghetti Squash
I’m back!
Peru was amazing. I traveled around almost the entire southern part of the country, from Lima to Cusco, driving through the Sacred Valley to Ollentaytambo, hiking Machu Picchu and crashing in Aguas Calientes, then back to Cusco and down to Puno and Lake Titicala, only to travel back to Lima for one more day before heading home. It was a trip filled with a new culture, kind people, energetic tour guides, lots of stairs, and llamas. I am now completely in love with llamas and hope to one day have one in my back yard. They are the gentlest and sweetest of creatures.
I didn’t expect it to take me such a long time to get re-adjusted to normal life, but as I got used to putting my hair in pigtails every day and climbing through ancient ruins, I also basked in eating out for every meal and neglecting to check my e-mail. I spent my first week back grasping to my school email account for dear life and eating turkey sandwiches for dinner. Only once my body re-adjusted to sea level and was caught up with my Economics reading did I have any desire to set foot in the kitchen.
The first meal I wanted to make after my return home was one full of comfort and warmth. Spending 9 days so close to the equator made me miss Boston’s transition to fall, and as I stepped off the plane I knew my red scarf would begin to make its daily appearance. Something hearty, healthy, and American. I remembered the barbecue meatballs I had seen on We Are Not Martha and knew they would pair perfectly with one of my fall favorites: spaghetti squash. A mixed-up version of spaghetti and meatballs, this meal was light and delicate with the strands of squash and perfectly moist meatballs, but received a richness from the barbecue sauce that was earthy and autumnal, no matter how frequently you may eat it during a July backyard bash.
Barbecue Meatballs and Spaghetti Squash (adapted from We Are Not Martha)
1 lb ground chicken
1 egg
2/3 cups breadcrumbs
1 teaspoon chili powder
1/2 onion, grated
1 teaspoon paprika
1/2 teaspoon salt
2 tablespoons apple sauce
2 tablespoons + 1 cup barbecue sauce
1 spaghetti squash
Cut the spaghetti squash in half and remove the seeds and pulp. Place each half cut side down on a plate and cover with saran wrap. Microwave for 15 minutes.
While the squash is in the microwave, mix all of the other ingredients together except for 1 cup of barbecue sauce. Form 1 inch meatballs (the mixture will be quite moist).
Heat a non-stick plan with a little Pam and place the meatballs so they are not too crowded together. Cook, turning every couple of minutes, until the meatballs are brown on all sides and cooked through.
Add the cup of barbecue sauce and stir until the meatballs are completely covered.
Remove the spaghetti squash from the microwave and, using a fork, pull out all of the “spaghetti” into a bowl.
Serve the meatballs on top of the squash.
Here is a wonderful guest post from one of my favorite foodies, I Dream of Greenie:
Cooking is still a rather foreign term to me, but I have always loved to bake. When I became
vegan, I was up for the challenge of tweaking childhood favorite recipes into dairy free delicacies.
To be honest, I don’t always like to follow recipes so of course there were some failures…don’t
even get me started on the time I tried to make pancakes with coconut flour (who knew I needed to add a binding agent?)
But when my best friend of 10 years’ birthday (who is also vegan) came along in July, I was
determined to bake her something that was just as fabulous as she is.
And I am pleased to admit that the dessert was a huge hit, though I didn’t love the frosting and
have since tweaked it in the below recipe.
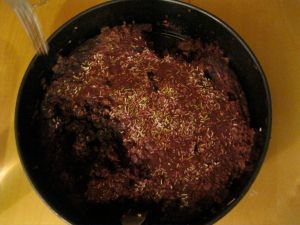
Without further ado, I present to you the Double Chocolate Peanut Butter Cookie Cake With
Chocolate “Buttercream”
I topped the cake with vegan sprinkles (yes they make them!) but it would probably also be
delicious topped with crushed peanut and/or drizzled with a peanut butter paste (peanut butter diluted with a bit of soy or almond milk) which you can put into a plastic bag and cut the corner off for piping.
If you or your guests are allergic to nuts, the double chocolate cookie cake is still ultra decadent. There are also tweaks in the recipe to make it soy and/or gluten-free.
Warning, we found the best way to eat this monstrosity was to dig right in with our forks…we
were drooling too much to take the time to cut a slice.
CAKE:
• 1 cup vegan margarine like Earth Balance
• 1 cup brown sugar
• 1/3 cup soft silken tofu, I like the Mori-Nu brand. *Also, to make it soy free, you can
substitute the tofu with Energ-G egg replacer (the amount of 1 egg) or 1 tbsp ground
flaxseeds mixed with 3 tbsp water*
• 1 1/2 cups flour *To make them gluten free, replace regular flour with Bob’s gluten-free
baking flour*
• 3/4 tsp baking soda
• 3/4 tsp vanilla extract
• 1/4 tsp salt
• 2 tbsp cocoa powder
• 1/2 cup peanut butter *I used crunchy natural PB because I like the texture of the peanut
pieces*
• 1 10 oz package chocolate chips *I used the Enjoy Life brand which came in a
mini size and made for lots of little moist morsels (try saying that 5 times fast)
PREP:
Pre-heat the oven to 375 degrees.
In a large bowl and in small batches, cream together the margarine and brown sugar. Add the
tofu (or egg replacer or flax seeds if you choose to use those instead) and vanilla and whisk until smooth and creamy.
In a separate bowl, combine the flour, baking soda, cocoa powder and salt. Add to the margarine mixture and combine well.
Add the peanut butter and mix well, then fold in the chocolate chips.
Butter a 9 inch round cake pan and bake for roughly 25 minutes. *Check on it after 20 minutes by sticking a knife through the middle. Cake is ready when knife comes out clean*
CHOCOLATE “BUTTERCREAM” FROSTING
Adapted from: NPR
4 ounces unsweetened (or bittersweet) chocolate, chopped
2 cups confectioners’ sugar
1 stick margarine, room temperature
3 tablespoons soy milk, plus more, if needed
1 teaspoon vanilla extract
1/2 teaspoon salt
Heat chocolate in a double boiler until melted (alternatively, microwave it at 30 second intervals).
Let cool to room temperature. In the bowl of an electric mixer fitted with the flat beater,
combine the confectioners’ sugar, margarine, milk, vanilla and salt, and beat on low speed until
combined, about 1 minute. Stop the mixer and scrape down the sides of the bowl. Increase
the speed to medium and beat for 2 minutes, then reduce the speed to low. Add the chocolate
and beat until combined, then increase the speed to medium and beat for 1 minute more.
If the frosting is dry, add more milk, 1 teaspoon at a time, until it is creamy but still holds peaks.
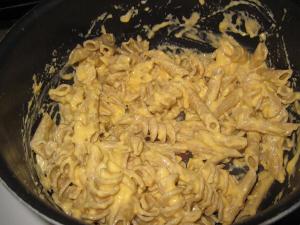
Fashionably Fit: Healthy Mac ‘n’ Cheese
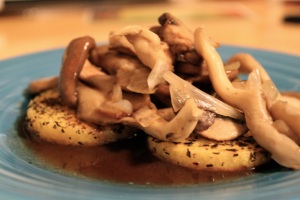
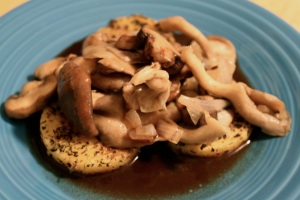
A Healthy Fit: Creamy Polenta with Mushrooms
Hi, I’m Angela from A Healthy Fit and I’m so excited to be posting for Sophie while she is away. I love checking out what she is making in her kitchen and I wish I could make more interesting meals. When Sophie asked for guest posters I was excited because this meant I would be forced to make a real recipe. So, here we go!
I use to have a weekly plan. On Sundays, I would sit down with my cookbooks and pick out a recipe that I had never made before. I adopted this plan because the same week night dinners were getting pretty boring and predictable. Somehow, this Sunday ritual went to the wayside and all that the Professor and I have been eating are our same 4-5 staple meals which include our favorite avocado enchiladas, Gardenburgers with sweet potato fries, tofu scrambles, and homemade pizza. Sure, these recipes are good and possibly timeless, but week after week, these meals only spell one thing…B-O-R-I-N-G!
After watching my sister in-law slave away to cook us an amazing meal last weekend, I decided that I had to bring back my “one new meal a week” plan. I decided to choose a recipe out of my newest (untouched) cookbooks, The Vegan Table by Colleen Patrick-Goudreau.
I chose on her recipe for Creamy Polenta with Mushrooms. I had already bought some pre-made polenta, so I would really only be making the mushrooms. I was hoping that these mushrooms would resemble one of the best meals I had in my life at PortaBella on my honeymoon. A tall order considering those mushrooms were seriously the best thing I have ever tasted. I’m not joking. If you are in Carmel, you must go to PortaBella and get the Quattro Funghi alla Panna. To die for.
I was also excited to make this recipe because it meant that I was able to use my new recipe book holder.
This baby worked like a charm. In addition to propping your cookbook up, it also protects the pages from the spills and splatters associated with cooking. If you are like me and are a tornado in the kitchen, then you would understand the brilliance of some protective coverage.
The other great thing about this recipe was that it called for red wine. Four tablespoons for the sauce, a glass for the professor and me!
Alrighty, so enough of my ramblings. Let’s get to the recipe!
Now, I ended up not making the polenta because I already had some in the fridge, but if you are interested in making it, you can view the recipe here.
Now, on to the shroomies.
Here’s what you’ll need:
- 2 tbsp olive oil
- 1 small sized yellow onion, finely chopped
- 2 pounds assorted fresh mushrooms (I used oyster, cremini, and portabella)
- 1 tbsp tamari soy sauce (I didn’t realize how low my bottle was, so not that much made it in my sauce)
- 4-5 tbsp red wine, for deglazing
- 3-4 tbsp balsamic vinegar
- 2 tbsp Earth Balance
- 1 tbsp minced fresh parsley for garnish (this was optional and I did not use)
Let’s get cookin’:For mushrooms, heat up the olive oil in a large sauté pan. Add onion and cook for a few minutes. Add mushrooms and sauté (medium heat) until they begin to get limp (the only time when getting limp is a good thing). You want to make sure that you don’t overcook them because if you do, they will lose their flavor and get a bit rubbery. No one likes rubbery shroomies! Sprinkle some tamari over those bad boys and transfer to a bowl.
My baby’s got sauce:
In the same pan that you used for the mushrooms, mix the red wine and vinegar. Stir in the “butter” and then take a little taste to make sure it is all good. Remove your sauce from the heat.
Plate it up:
Place your polenta in a bowl (if you used the recipe) or on a plate if you heated up your pre-made polenta, load it up with mushrooms, and then drizzle the sauce.
The final product:
Looks divine right???
It was pretty darn good, but I think the sauce could be a bit more complex and possible a bit thicker, maybe some garlic could be added. I don’t know, but it was missing a lil’ somethin’ for me. It was not a replica of my honeymoon meal, but oh well.
I’m glad that I am back on my “one new recipe a week” plan and this one was pretty darn good. I can’t wait to make some more recipes from this cookbook.
Vacation!
Hi Everyone!
Tomorrow morning I’m leaving on a fabulous little vacation to…..Peru!

While I am gone, I have some great guest posts lined up from some of your favorite Hollaback Girls. So stick around and see what delicious things they’ve been cooking up.
See you after Columbus Day!
Chicken Fajitas
Cumin is definitely my all-time favorite spice. Just by opening the jar I am enveloped in a warm puff of brown smoke, flown to an exotic land that is a direct contrast to Boston’s cold, drizzly day.
Foodie confession: I use cumin in everything.
From a rustic vegetarian chili, to a spicy Indian curry, to some salmon I’m just throwing on the grill, just a little (or a lot?) of cumin adds such a depth of flavor and fun that you really can’t go wrong. I’ve been known to go on cumin overload, dumping almost half my jar into whatever is simmering in the pan. But honestly, it just makes the dish better.
My Mom was visiting for the day yesterday and suggested I try serving up some of her quick and easy weeknight fajitas. When I realized that one of the five ingredients (and only spice) was cumin I knew that these sizzling babies were going to be on the menu. They didn’t disappoint. I threw them together in less than 20 minutes, perfect timing between Z coming home and my online class starting. And with just a few accompaniments of fresh salsa verde and a dollop of sour cream, you don’t need all of the usual cheese and tomato shebang. You just savor the cumin and lime juice in all of its glory.
Chicken Fajitas
1 tablespoon olive oil
2 chicken breasts, sliced into 1″ strips
1 onion, sliced into 1″ strips
1 green pepper, sliced into 1″ strips
2 cloves garlic, minced
2 – 3 tablespoons of cumin
Juice of 1/2 a lime
Salt and pepper
Corn or flour tortillas, salsa verde, and sour cream to serve
Heat the oil in a non-stick pan. Add the onion, pepper, and garlic and cook until soft, about 10 minutes.
Add the chicken strips and cook until no longer pink in the middle, about 5 minutes.
Add the cumin and toss the chicken and vegetable mixture until everything is nicely coated and the cumin almost forms a paste. Add the lime juice and stir throughout.
Serve.
Lucky me, I have enough leftovers for fajita salad for lunch tomorrow! If only I could make a cumin salad dressing too.
White and Green Crockpot Chili
I have fallen in love with my new best friend: the crock pot.
For our anniversary, Z bought be a giant crock pot. Unlike most girls who shiver at the thought of getting home appliances for special occasions, with this I was thrilled. I had been asking for one for months! If diamonds are a girl’s best friend, the crock pot is a girl’s own personal chef. Love at first sight, if you ask me. Z sure knows the way to my heart.
Though I thoroughly enjoy spending time in my tiny and counter-space-less kitchen, coming home at 10:30 pm after a night of classes to cook dinner is something I would dread with all my heart, and in reality I would more than likely end up at the take out joint down the street. Or even worse, at a Burger King. (I kid…however, there is one in direct view from my living room window.)
But walking into my apartment after a 15 hour day to the smell of chili that has been cooking all day, letting the spices marinade and the meat tenderize, is nothing short of a miracle. I may have slightly burnt my lips after kissing the glass lid, thanking Mrs. Crock Pot for saving me from low blood sugar and the $3.99 Steakhouse burger, but it was worth it.
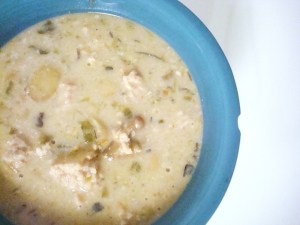
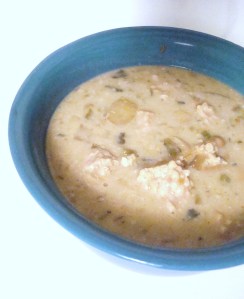
I adapted this recipe from Eat, Live, Run. It worked wonderfully in the crock pot with some ground chicken instead of a whole breast, and the sour cream adds a tang that is so unique and delicious that I found myself licking the bowl after dinner. This chili didn’t even need the usual toppings of cheese and a side of cornbread, because it was perfection in itself.
White and Green Crockpot Chili (adapted from Eat, Live, Run)
1 lb ground chicken
1 medium onion, chopped
1 T vegetable oil
2 cans cannellini beans
14.5 ounces chicken broth
2 4-ounce cans chopped green chilies
1 tsp salt
1 tsp cumin
1 tsp oregano
1/4 tsp cayenne
2 garlic cloves, minced
1/2 cup milk
8 ounce reduced fat sour cream
Add all of the ingredients except for the milk and sour cream into your crock pot. Stir to combine and cook on low for 8 – 9 hours.
When you are ready to eat, mix in the milk and sour cream and warm the mixture up. Serve!
Please excuse my chipped bowl. I got a little too excited about dinner.
Swedish Meatballs with White Bean Mashed Potatoes
Some people may say that I have a slight cooking obsession. But then there’s home decorating.
My apartment is currently what I call “post-college chic”, meaning that I haven’t really invested much into my rental apartment. No more movie posters, but still using the clear plastic drawers from my freshman year dorm room. But if you find me perusing the internet and not looking for recipes, I’m usually looking at paint colors, new duvet covers, and the possibility of completely renovating our kitchen. If I could somehow convince my landlord to invest.
I love home decorating. I love looking at other people’s apartments, shelving ideas, color combinations. I love sitting in my own apartment, gazing at the walls, imagining what artwork I could hang and how at a cocktail party people would comment on my fabulous serving ware. Z thinks I’ve started to become a little obsessive, as any guy would who just needs a bed and an internet connection to be content at home. But I think its perfectly normal to have 15 web pages open at once while you carry around your laptop and “visualize” new crown molding and a leather ottoman.
A girl can dream, right? Or, she can go to IKEA.
IKEA is the perfect place for a decorating eye on a budget. Something for every taste, in every price range, with Swedish names that feel so European (if you can pronounce them). Don’t even let me go into the Marketplace. At least not without 2 shopping carts.
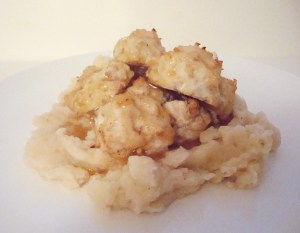
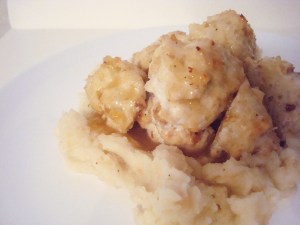
In my recent “OMG I really want to decorate my apartment now” mode, I’ve had to compromise. I need to just get through the next few busy weeks before I can have a weekend to do a little visual tweaking. And to get me through I made my second favorite thing at IKEA (besides the shopping): Swedish meatballs. In my opinion, even people who don’t like to shop should go to IKEA just for some good, cheap food. Or use their food as an inspiration to deter a possible spending spree that would make me wind up with more of those little wrenches than I can handle.
Swedish Meatballs with White Bean Mashed Potatoes
For the Meatballs
I slice bread
1/8 cup milk
1 lb ground chicken
1/2 onion, finely chopped
1 egg while
1/2 teaspoon cumin
1/2 teaspoon nutmeg
1/4 teaspoon allspice
Salt and pepper
For the Potatoes (adapted from Oh She Glows)
1 large russet potato, peeled and chopped
1 can white beans, drained and rinsed
Salt and pepper
For the Sauce
1 tablespoon olive oil
1/4 cup flour (I used GF Corn Starch)
14.5 oz chicken stock
Salt and pepper
Preheat oven to 400*
First, put the bread and milk in a bowl and let soak for 5 minutes.
Put all of the meatball ingredients in the bowl with the bread and milk. Mix together thoroughly. Shape into small, 1 oz balls and place on a baking sheet. Put in the oven for 20 minutes or until they are cooked through.
Put the potatoes in a pot, cover with water. Bring to a boil and then simmer for 20 minutes, or until the potatoes are soft. Drain and put back in the pot. Add the beans, salt and pepper and mash together.
In a saucepan, add the oil and flour and cook over a medium heat until they form a paste. Slowly add the chicken broth, adding about 1/4 to 1/2 a cup at a time and whisking until smooth. When all the stock is added, season to taste with salt and pepper.
Serve.
This meal may have deterred me from making an IKEA trip this weekend. But then there’s always Home Depot.


